Revised 11/19/2016
When you open up your Google mail, do you find that you are swamped with emails and that you need to organize your Gmail Inbox? Borlok VA eTraining Manuals has just the eTraining tips for you. Here are two training tips that will give you shortcuts that should make your life a whole lot easier.
Organize Your Gmail Inbox
Deleting Multiple Rows of Emails Using the Shift Key
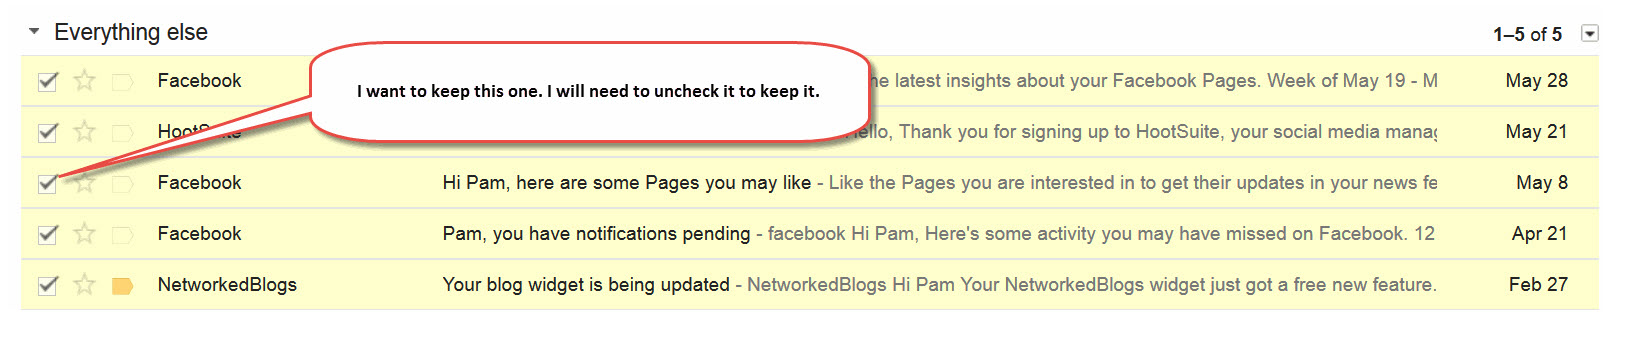
So you want to delete multiple rows of emails that are consecutive? This is an easy thing to do. Check the first box for the row you wish to delete. Then scroll down to the last row you want to delete, hold down your shift key on your keyboard and then click in the box for the last row you selected. By doing this, all of the rows in between the two checked boxes will also be selected, and you’ll be able to delete them all at once.
Make sure the rows you want to delete are all next to each other. If you have a row that you want to keep nestled in between the rows you want to delete, you will also delete the one you want to keep.
You can click on the images to enlarge them.
Organize Your Gmail Inbox into Categories
Wouldn’t it be nice if you could organize your Gmail Inbox into Categories? Say for instance you have all your emails coming into your inbox but you’d like to separate your social media, promotions or more into separate tabs. This is a piece of cake.
Here are the steps to follow.
1. Log into your Gmail account.
2. Click on your Setting icon that looks like a gear. This is located in the upper right section of your inbox. Here, let me show you.

3. A new window will open which will be your Settings window. Click on the Inbox tab as shown below:

4. The new window that will open will be for your Inbox Settings. On this page, you will see Categories, Importance Markers and Filtered Mail. The one that we are going to concern ourselves with right now is Categories. You’ll notice that you have 5 categories and an option for whether or not you want to include any starred selections in your Primary category tab or not.
The categories I use right now are Primary, Social (Facebook, LinkedIn, etc.) and Promotions. I’m currently keeping my starred selections in my Primary Category, so I have that checked. Let’s take a look at what it will look like with what I have chosen as my choices:

But wait! What if you don’t like what categories you have added; can you change them? Sure you can. You can always go back into the Inbox Categories and uncheck choices, or check those you haven’t added yet. You also get a preview showing you what your category message tabs would look like. In addition, it is easy to deselect all categories to go back to your old inbox.
5. Save your choices! You do this by scrolling to the bottom of your open window and clicking on the tab for Save Changes. Do not forget to do this step or your changes will not take effect.

So what did it look like when I was done? It will be so much easier for you to organize your Gmail Inbox if you use categories to keep your important emails in your Primary tab. Why not try it out right now?
